

DIY Pom Pom Duvet Cover + Fabric Dying
I was once so in love with our current duvet cover that I wanted the entire Urban Outfitters waterfall ruffle collection to fill my apartment in waves and waves of ruffley goodness.
I ended up only getting the shams and the duvet cover, but was still overjoyed at how cute it looked.
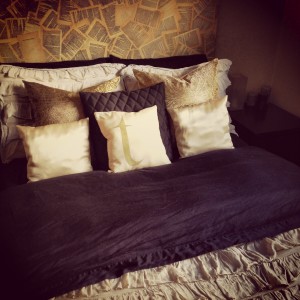
An updated bedroom look with black, gold and the waterfall ruffle duvet cover.
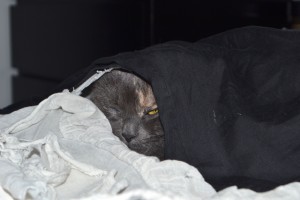
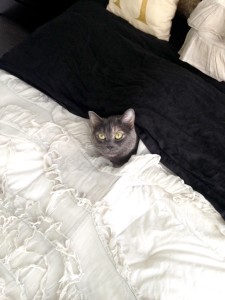
Fast forward to 5 years later and the shams are long gone, having been ripped and shredded to smithereens, with the duvet cover soon to follow in their tracks. The ruffles are now kind of just sad, ripped(thanks Sev) and flattened, plus there is a huge hole in the duvet cover where Sev likes to crawl into and sleep. I recently just discovered that she’s been plotting to make the duvet cover into her own personal sleeping nest for the last 2 years. That’s how long it took for her to rip a big enough hole in the duvet cover for her to climb into and sleep.
It’s time for a new one.
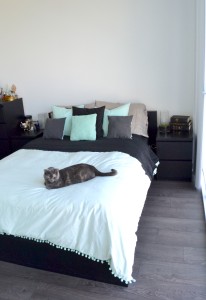
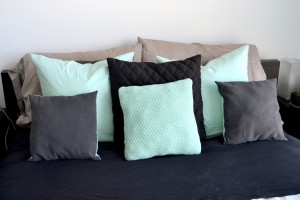
With our new apartment, I decided (and Nick sort-of agrees) that it was time to re-do the bedroom a bit. Previously, our bedroom was done in grey’s, gold’s and black, which was nice, but I wanted something that was a bit more bright, and airy, and felt a bit fresher. We are still keeping the black furniture and sheets, but I’m going to introduce a pale mint green as the colour for the duvet, and work it into the abstract painting that I’m planning for above the bed. We’ll keep the grey’s and blacks, but I’m going to just use gold as accents around the room and re-do the throw pillows (Sev has also partially destroyed those).
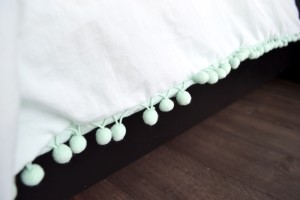
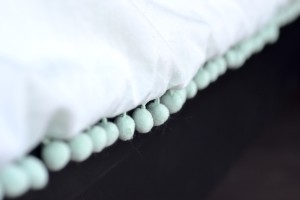
While searching for inspiration, I came across this mint pom pom duvet cover from Urban Outfitters. I immediately loved it, but was hesitant to buy it because I didn’t want it to fall apart so quickly like the last one. I decided that this could be a fairly simple DIY and I could just buy some pom pom trim and sew it between two flat sheets. Voila. Easy as pie.
However, it’s extremely difficult to find decently priced flat sheets in a mint colour, and I was worried about the pom pom trim not matching.
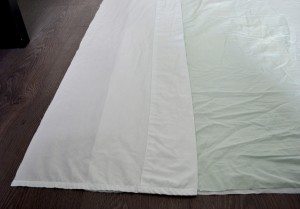
So, I went with the dying route. I bought two plain white queen cotton sheets at Wal Mart. After hours of searching, I found plain white pom pom trim. I bought Rit dye and was aiming to dye my sheets in the colour Hemlock from the Pantone Spring 2014 collection. The sheets ended up coming out a bit lighter than planned, but I still love the colour.
There are complete instructions for all the different dying methods on the Rit website that you should read thoroughly before starting! It’s a bit of an intensive process, but worth it if you’re able to get the shade that you want! Also, when in doubt, ask their dye experts, they’re very helpful!
Now that my sheets were dyed, it was time to sew them together to make the duvet cover. It took me a while to gather my supplies, but this is what I ended up using to make a duvet cover for my double size duvet:
- two queen sized sheets dyed in a mint colour. (or colour of your choice)
- a spool of thread to match your sheets
- approx 7m of pom pom trim* - measure the two long sides and 1 short side of your duvet to determine how much you will need then add about 6 extra inches.
- 7 snaps - for closing the duvet cover shut - preferably in a matching colour, but white will do
*Note, that I only put pom pom trim on 3 sides of my duvet cover (not the top side), so if you want it on all 4, buy another 2m.
I followed these steps for assembling the duvet cover. You will be cutting your sheets into 3 pieces that will make up the cover - Top Sheet, Bottom Sheet & Bottom Flap. It was fairly easy once I got going, and I was actually really happy with how it came out!
Duvet Cover Assembly:
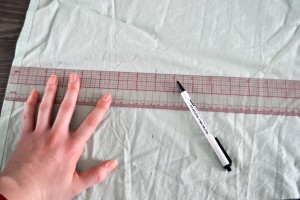
- Measure the length and width of your duvet
- Add 3 inches to both the length and width
- Example: My duvet measured 74×84 inches so with the addition of 3 inches the final number would now be: 77×87
- The final number is now the size that you need to cut the top sheet for your duvet cover.
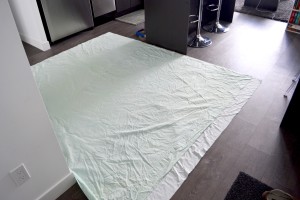
- Measure your sheets, mark along each side that needs to be cut, and cut one sheet down to the size needed for the top of your duvet cover. When cutting down your top sheet, cut off either of the long sides, but for the short side of your top sheet, make sure that you cut off the edge that is the finished double fold edge. (this is the part that would go near your head on a bed)
- For the bottom sheet, you are going to cut the width the same (in my case that was 77inches) but for the length, you are going to cut it 3 inches shorter (84 inches for me). For the bottom sheet, when you are cutting off the length, cut from the bottom of the sheet (the part that goes near your toes on a bed)
- Next, you want to take the double edge section that you cut off of your top sheet. This becomes the piece for the bottom flap. Lay down your top sheet, and then lay the bottom(shorter) sheet on top. Take the piece that you cut from your top sheet and line up the portions that are doubled - this piece becomes the flap for opening and closing your duvet cover. It is also where you will attach your snaps. Cut off any extra that hangs past the top sheet, so that the edges line up.
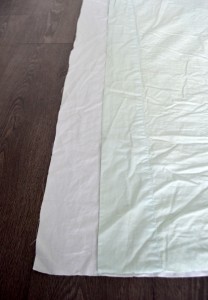
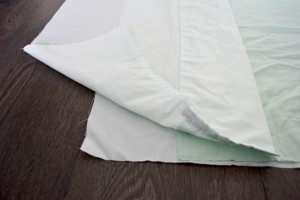
The part that extends past the edge of the sheet touching the floor is what you are going to cut off to make sure that the edges meet.
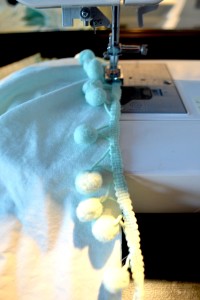
- Now, take your top sheet and starting from one of the longer sides, begin to pin your pom pom trim around 3 sides of the sheet.
- Once all your trim is pinned, slowly stitch it onto the sheet using a zig zag stitch.
- Lay your top sheet with the pom poms on the ground. Lining up the top edges, lay your bottom flap piece over top.
- Now, lay your bottom sheet over both, lining up the seams and the double edges of the bottom sheet and the bottom flap.
- Pin around the entire perimeter of your duvet cover, making sure that the pom poms are not stuck in the seam.
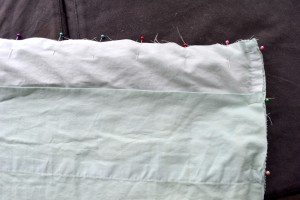
- Sew the perimeter closed with a zipper foot and a reinforced stitch. Go very slowly, and again, make sure that the pom poms are not stuck.
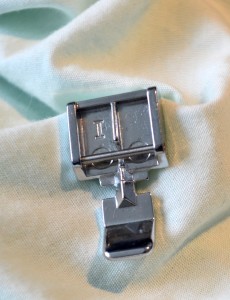
Zipper Foot
- Once you have very carefully sewn your duvet cover shut, turn it inside out and take a test run to see if it fits on your duvet. Pray that it does. Just kidding, it will fit.
- Spread out your duvet cover and measure the length of the opening. Find the middle and then place 3 snaps on either side of the middle, spacing them out as evenly as possible.
- Sew down the snaps to the bottom and then the top of your duvet cover, making sure that they are lined up
- Turn your duvet cover right side out, insert duvet into cover, and get cozy!

I know it seems complicated having to explain it out like that, but once you get going it makes a lot more sense. I was trying to write the tutorial before actually doing it, but couldn’t visualize exactly how I would do things before actually doing it. So, now that it’s done it seems easy as pie and I’m confident that you’ll be able to pull off making your own duvet cover as well!
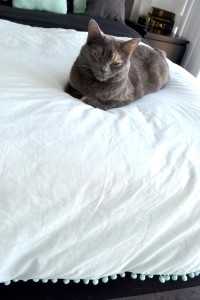
Not impressed that she can no longer sleep in her duvet cave.
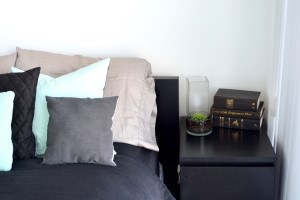

To keep with our new mint theme, I also re-did the pillows, and the tutorial is coming soon! They were super easy and can be done in a couple hours.
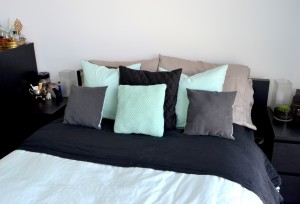
Overall, I’m super happy with how everything came out, and I definitely feel like the bedroom has the more fresh, bright & airy look that we were going for! Now all we have to do in here is make a big abstract painting for above the bed to tie everything together and this room will be finished!
Let me know what you think of the duvet cover!
xo, tess.

14 responses to “DIY Pom Pom Duvet Cover + Fabric Dying”
About Angean

Shop Angean on Etsy!
Archives
- January 2018
- October 2017
- September 2017
- August 2017
- April 2017
- February 2017
- January 2017
- December 2016
- November 2016
- September 2016
- August 2016
- July 2016
- June 2016
- May 2016
- April 2016
- March 2016
- February 2016
- January 2016
- December 2015
- November 2015
- October 2015
- September 2015
- August 2015
- July 2015
- June 2015
Bloglovin’
Follow


Very cute! Such a simple idea that adds a lot of character. This would look great along a pillow edge also!
Thanks Kim! I know, that was my original plan, but the trim got a bit expensive, so I had to scale back a bit, they even had a mini pom pom trim that I was dying to use - next time though 🙂
Wow, this is so cute!! I just got a sewing machine from a friend and have NO idea how to use it. I look forward to the day I can make adorable things like this. Thanks for sharing!
Thank you Rachel! I’m sure you could find an instruction manual online! Once you know how to thread them, it’s super easy from there 🙂
This is very pretty! I love how pissed off your cat looks. 🙂
Thank you Nina! Haha, I know, it was the perfect photo 😛
Great tutorial! The end result is so stylish and cute!
Thanks Marci! That’s what I was going for 🙂
So sad your cat ruined your duvet cover but that one you made is adorable! Cute kitty too!
Thank you so much Brittany! She is cute, but she’s sassy!
This is such a cute idea! I also need new duvet covers and pillow cases so I might use your tutorial for it!
And your cat is super adorable!
Thank you so much Ramona! I would love to see how it turns out if you do 🙂 Thank you, I like to think so!
I have noticed trimmings like pom poms are making a come back. Great looking pillow. Adorable kitty.
Yes, I’ve noticed that too! Thank you 🙂