

Scrap Fabric Geometric Pillow DIY
If you’re anything like me and you love sewing, you probably have a huge bin filled with scrap fabric. Maybe you’ve taken it a step further and organized all your fabrics by colour in a craft room that I would probably be incredibly jealous of.
It is literally one of my dreams to have a craft room one day. All my supplies perfectly organized, colour coordinated, and accessible in neat little drawers. Maybe I invest in a huge cutting table and mat for my fabrics. Perhaps my easel is off in one corner. Maybe I get really into ribbons and have them arranged in neat little rows along the wall beside all my perfectly wound threads. There could be a little reading nook beside a window, and obviously the natural light just pours into the room for perfect painting conditions.
God that sounds good.
I maintain the statement that I would get a lot more done if my sewing machine and paint could all be out, yet organized, so that I could use them any time inspiration struck.
Anyways, enough daydreaming. My scrap fabric is in a bin for now. I’ve been on a cleaning kick lately though, so I’ve been trying to find nice, a.k.a modern ways to use the fabrics. I have a bit of a problem throwing things out that I think I’ll need, so trying to use the fabric for a DIY was the best solution in my mind.
Most of the fabrics that I have are silk or satin from back in my high school days when all I wanted to do was sew pretty dresses. Those I’ve decided to save for some lounge wear pieces, and I’m hoping to get a post up about that soon!
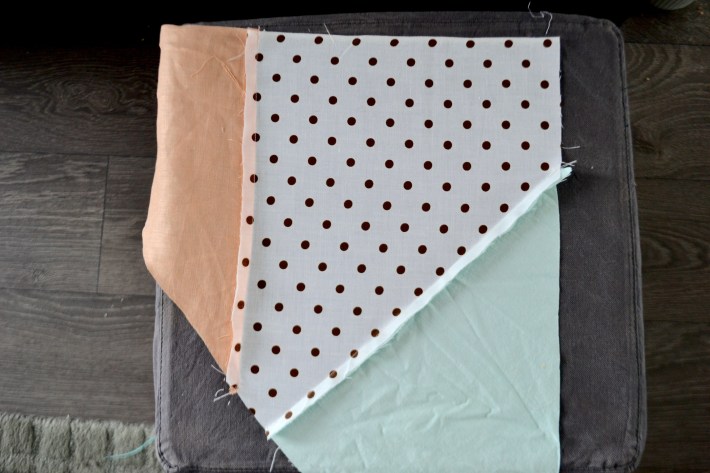
The remaining cotton / linen / acrylic fabrics are what I’m going to be using for this fairly easy and essentially free (yay!) DIY. I say essentially free because I am re-doing some throw pillows that I already have. If you have to purchase pillows, you can find some decently priced ones at IKEA.
I even made it even easier for you guys by designing 3 different templates for you to use when cutting your fabric. Use them as inspiration and scale them to the size of the pillow that you have.
Originally, I was just going to do the geometric pattern on one side and have the back be solid. As it turns out, Â I had so much fun making the pillows and seeing how the designs would look, that I ended up doing geometric patterns on both sides of my pillows.
So, for some inspiration, here are the 2 designs that I used (P1 & P2), plus a third for a little extra 🙂
I know they are all fairly similar, but choosing different scrap fabric for each of the pieces helps to make each pillow more unique. So for my two pillows I worked with designs P1 and P2. If you like those designs also, follow along for the pattern pieces and how to assemble them both!
Scrap Fabric Geometric Pillows
Supplies:
- Scrap fabrics. I had 6 different fabrics that I was working with. See my notes below for how to select which scrap fabric to use to create an interesting pillow!
- Thread. Because most of my fabrics were lighter colours, I used white thread when sewing the sections together. I also had a light purple thread in addition to my white for when I sewed the pillows shut.
- Pillows. Mine were square pillows that I already had from IKEA. I simply had to remove the black cover and I was left with my stuffing.
- An Iron. I found that an iron was essential for ironing out some of my more wrinkly fabric and for pressing the seams that I had sewn in order to get nice crisp lines.
- Fabric Scissors
- Regular Scissors
- A ruler
- A marker
- Two large sheets of paper - size will depend on how big your pillows are
- Pins
- A sewing machine
Fabric Notes:
Depending on the number of sections of your design, try and have at least 2 more fabric options than you have sections. For example, I had 4 different sections so I used 6 fabrics. This ensures that there is a bit more variety in your sections and leads to a more visually interesting pillow. It also makes sure that the pillows go together, without being too matchy-matchy. I also used a selection of cotton, linen and acrylic which made for different textures in my pillow. If you are going to use linen, consider that it is a bit of a difficult fabric to work with, as it can slide around a bit when you are trying to sew it. If you wanted, you could use a light fusible interfacing on the back of the fabric which would give it more structure and would also help it to be less translucent. I chose to add a pattern into my pillows, as well as one warm colour and one neutral to ensure that my pillows were nicely varied. I also used some of the scrap fabric left from the pillows in our bedroom, so it creates a nice kind of flow through the house. Because this project is done with scrap fabric, I know it may be hard to be picky. If you do have a large amount of different scrap fabric to choose from though, try and use my tips above as guidelines.
Instructions:
- Measure the size of your pillow. Mine was about 17″ x 17″.
- Add an inch to each side for seam allowance. I was now at 18″ x 18″
- Trace that size of square onto each of your sheets of paper. I made two different pillows, so I had one pattern on each piece of paper.
- Using the diagrams below, draw the approximate shapes of the pattern pieces into your square, labelling each section and including the markers (square, circle and triangle) along the seams. You can also label each piece with P1 or P2 if you wish, but I just worked with one pattern at a time and was able to keep track of each piece.
- Starting with P1, cut out each of the pieces and pin them onto whichever fabrics you like.
- When it’s time to cut out each of the fabrics, cut about 1/4 - 3/8″ away from the pattern piece. This becomes your seam allowance. Try to cut the line as straight as possible, but don’t worry if they come out a bit uneven. I’ve also found that for me (as someone who is right handed) it is easier to cut my fabric straight when the pattern piece is on the right hand side of my scissors.
- If you also want to do the back side of your pillow in a geometric pattern, repeat steps 5-6 for the back of the pillow, keeping the front and the back pieces separate from each other in a small pile. I just unpinned the fabric from the pattern pieces and set them aside. Alternately, you could pin two different fabrics to one pattern piece at a time to make this go faster.
- Now, move onto P2 and repeat steps 5-6 for the front and back of that pillow. If you want to do a plain side on the back, just cut out a square in the size that you needed from step 2.
- Now that you have all of your pieces cut, move on to the assembly instructions for each pillow below.
- Note that when you are pinning pieces that have a point at the end (triangle pieces), pin the straight side first. It’s ok for the point to hang off the end a bit as this is really just extra fabric. If you are pinning a piece that has two triangle ends, just try to have an even amount hang off of each side.
P1 Pillow Assembly
- Pin C to D along the circle line with right sides together. Sew, with 1/4 - 3/8″ seam allowance, making sure to back tack at the beginning and end.
- Press the seam open, or towards a darker fabric if one of your fabrics is more translucent.
- Pin A onto CD (the piece that you just sewed together) along the triangle line. Sew and back tack.
- Press seams open or to one side
- Pin B onto piece ACD along the square line. Make sure that the seams are pinned in the direction that they were pressed. Sew and back tack.
- Press seams open or towards darker fabric
- Flip fabric over to the right side and press the entire piece of fabric, making sure that the seams are open and straight
- Repeat for the back side of the pillow.
- With right side together, pin around the perimeter of the pillow, leaving a 6″ opening on one side for your insert.
- Sew together with 1/2″ seam allowance.
- Cut the seam allowance down to about 1/4″ and cut off the corners, being careful not to cut through the stitching. We cut off the corners so that when the case is turned inside out, the corners are more crisp.
- Turn case inside out, insert pillow and sew the opening shut being as careful as you can to make your stitches invisible. One done!
P2 Pillow Assembly
- Pin D onto C along the square line with right sides together
- Pin B to C along the triangle line with right sides together
- Sew and back tack both seams that you have pinned
- Attach piece DCB onto piece A along the circle line. Sew and back tack
- Press all seams either open or towards a darker fabric, making sure they are straight
- Repeat for the back of the pillow.
- Follow steps 9-12 from P1 pillow assembly to finish Pillow P2
Arrange pillows on your couch or bed and admire your hard work! In the future, I plan to use more of my polka dot fabric scrap fabric to cover another pillow on our couch so that they are all more cohesive.
Here is a look at how my 4 designs came out before I stuffed the pillows in:
As I was sewing the pieces for each pillow side together, I was amazed at how much I loved the results! I was also really glad that I finally found a way to use my scrap fabric! For so long I had been stuck on wanting to make some clothing with them, but it just didn’t work. Thankfully this did, and it adds an amazing pop of colour to our living room! Now, if only we could find a light grey mid century couch �?�
Let me know what you think of my pillows! If you’re planning on making your own, I would love to help by fine tuning your design with you, or offering advice on assembly instructions. Hopefully, you find this scrap fabric pillow tutorial as useful and fulfilling as I did!
xo, tess.

29 responses to “Scrap Fabric Geometric Pillow DIY”
About Angean

Shop Angean on Etsy!
Archives
- January 2018
- October 2017
- September 2017
- August 2017
- April 2017
- February 2017
- January 2017
- December 2016
- November 2016
- September 2016
- August 2016
- July 2016
- June 2016
- May 2016
- April 2016
- March 2016
- February 2016
- January 2016
- December 2015
- November 2015
- October 2015
- September 2015
- August 2015
- July 2015
- June 2015
Bloglovin’
Follow


I LOVE LOVE these pillows - cute! This might be my next weekend project. Thanks for sharing!
Thank you Alexis! I would love to see how they come out if you make them 🙂
What a fun project! I definitely have some cotton fabric scraps waiting to be made into something beautiful 🙂 I love how Spring-y your pillows are too!
Thanks for sharing!
xo, Haley
Thank you so much Haley!
Cute design…. Thanks, I’m going to give it a try and link your blog!
Thank you so much! I’ll be checking your out in the meantime 🙂
What a great project! I have tons of scrap fabric, especially holiday. Maybe I’ll make some Christmas pillows for our guest room! Thanks for the inspiration.
Thank you so much Ellen! That would be a great idea!
That’s such a great DIY!!
Thank you for sharing this with us 🙂
I’m going to try it as soon as I can!
Have a nice day dear!
Sybille ♡
The New New Girl
Thank you so much Sybille! I’d love to see how they come out if you do make them 🙂
Awesome idea!! Totally sharing this with my friend!!! I love the way they turned out, super cute!!!
Thank you so much Michelle 🙂
love this project! saving for a rainy weekend
Thank you so much Leslie!! I would love to see how they turn out 🙂
Great looking pillow. Really good instructions.
Thank you so much Candy! I was hoping they would be easy to follow 🙂
Looks so cute and simple to do, ill give a try !
Thank you so much 🙂 I’d love to know how they turn out!
This is fabulous! Thank you for the easy to follow template!
Thank you Brandy! You’re very welcome 🙂
I need to start sewing again. These are cute.
Thank you Candy 🙂
we share the same dream for a craft room - such a good idea for leftover fabric
Haha let’s hope we get those craft rooms soon Madi! Thank you so much 🙂
[…] Get tutorial Categories home decor, living room, pillows & rugs […]
I love those colours! I really need to add more pops of colour in my house and this is a great way to do it.
Nellwyn | http://www.thecardinalpress.com
[…] 7. Geometric Pillow : Angeon […]
[…] think my obsessive need to match has gotten a lot better. The last time that I made pillows, these scrap fabric geometric pillows to be exact, they didn’t perfectly match! So I took that inspiration and made a pom-pom […]
[…] you a crafter? Do you have some scrap fabric lying around? Tess at Angean used hers to make some stylish throw pillows for her home. If you’d like to do the same, she’s […]